
How’s it going there?
This post is to show how I created a web app to control an LCD with a Raspberry PI using Spring Boot and Thymeleaf. This is another blog about Java on Raspberry PI.
Spring Boot is an extension of the Spring framework, which eliminates the boilerplate configurations required for setting up a Spring application.
Thymeleaf is a Java template engine for processing and creating HTML, XML, JavaScript, CSS, and text.
Picture 1: LCD example
I have the St7920 model. St7920 or 12864zw is probably the cheapest 128×64 graphic LCD that you can find.
Schematics
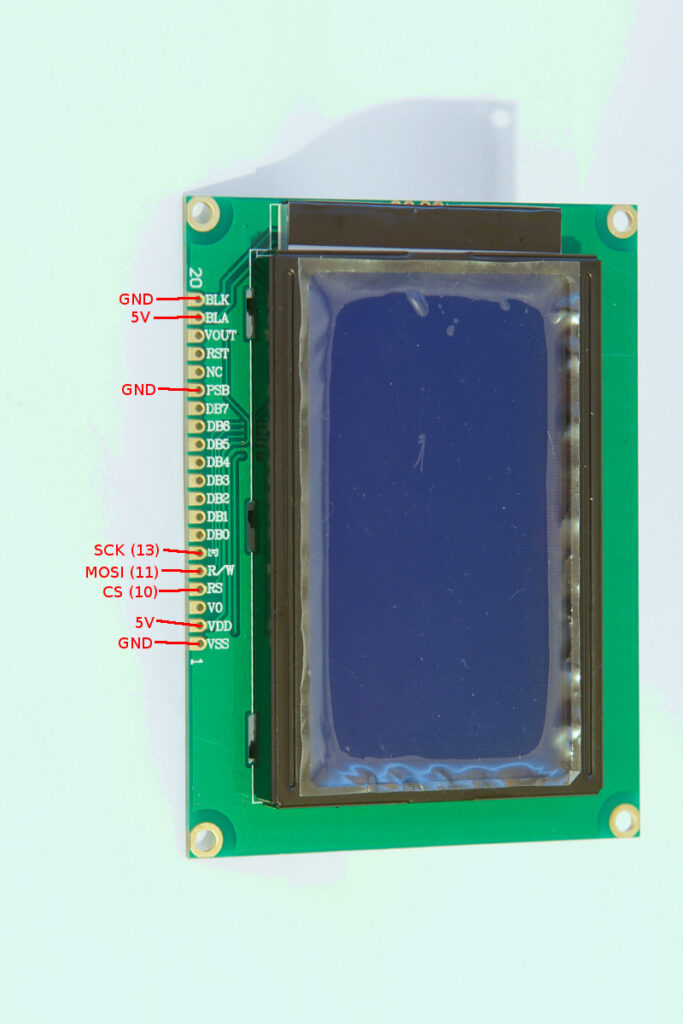
Picture 2: LCD Schematics
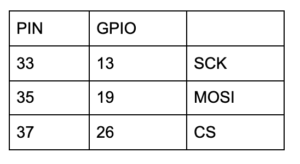
Table 1: Raspberry PI PIN and GPIO map
I’m using this Java API
Idea
A simple Spring Boot Thymeleaf app where it shows a form with a 128×64 table. Each table position is the representation of the LCD graphic display. I created an Array of bits with all positions of this table.
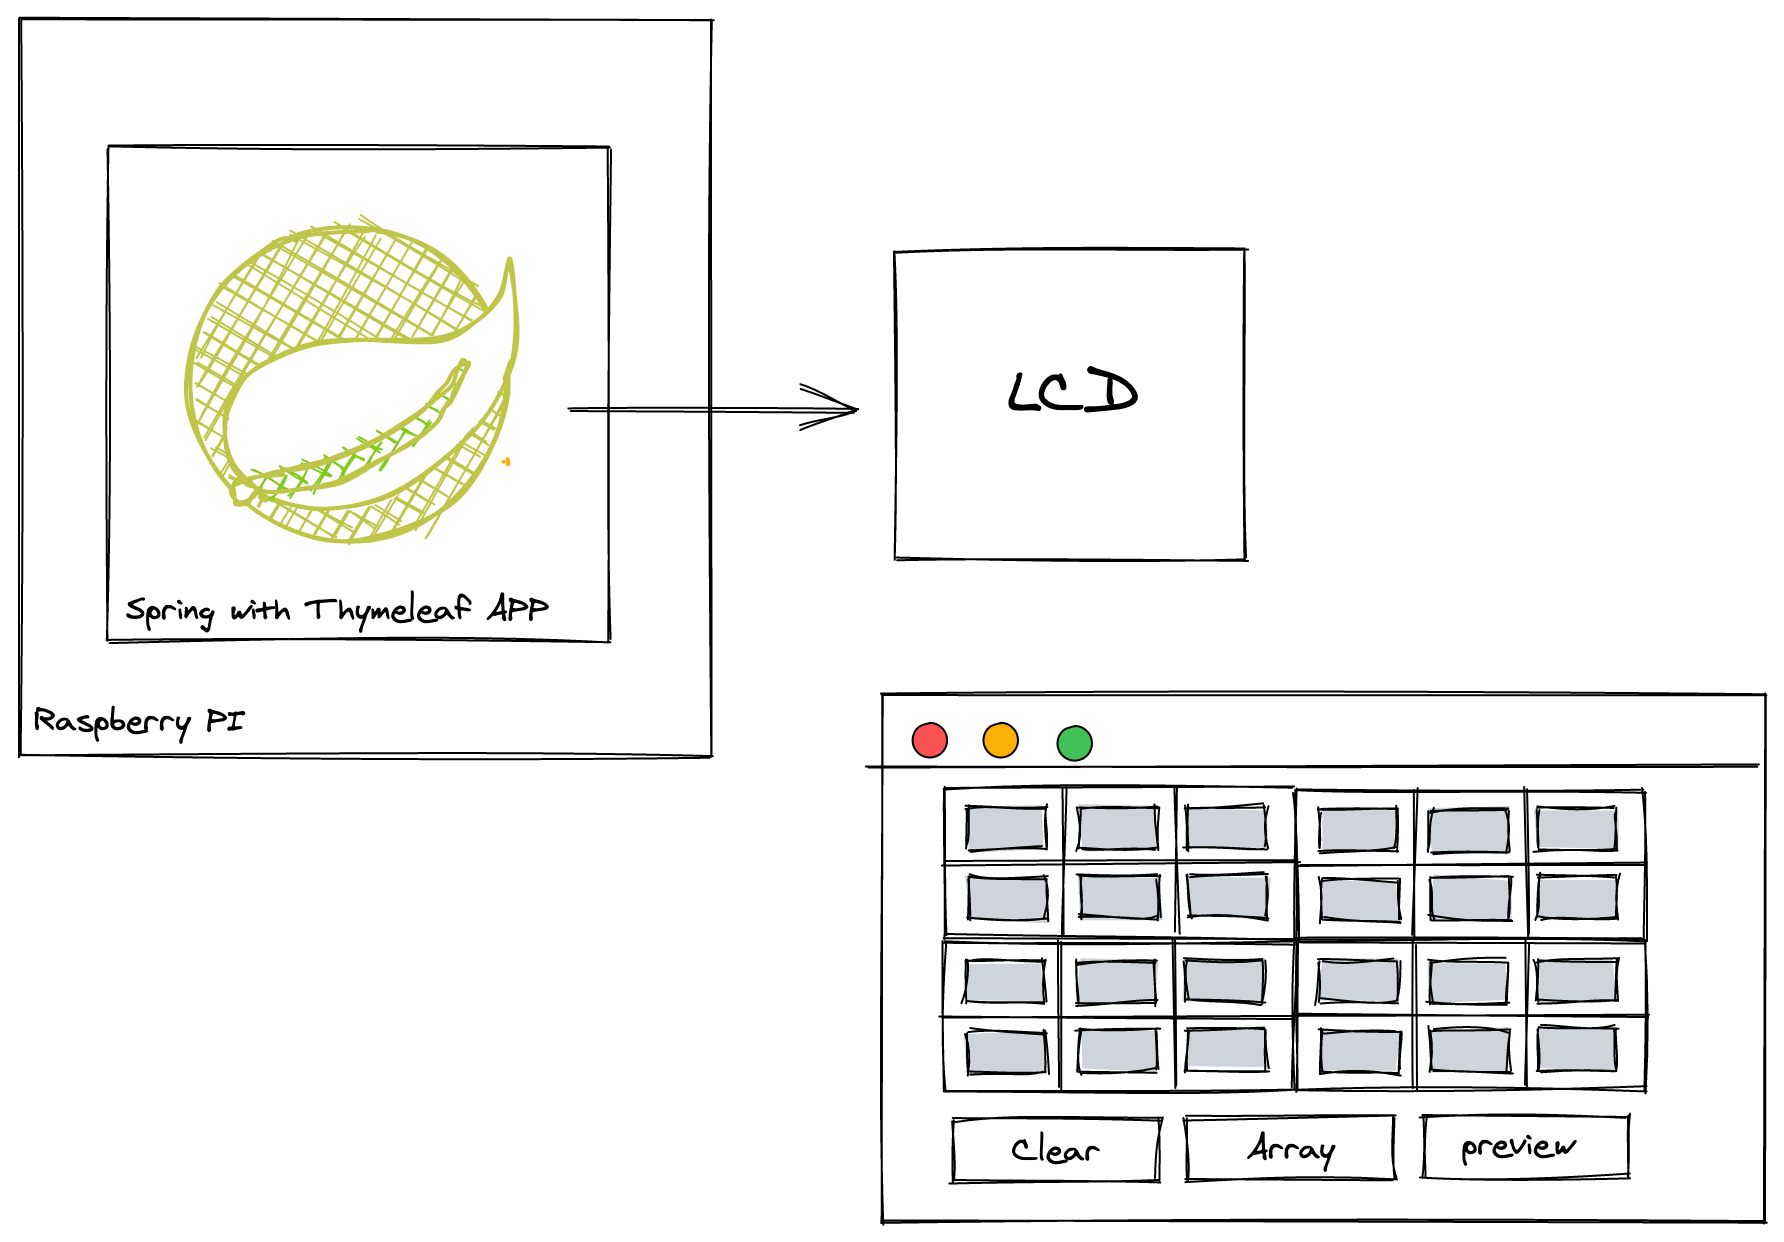
Picture 3: end-to-end flow
The Array button generates an Array of Bits, and preview creates a picture of the result.

Picture 4: Shows the form table that represents the 128×64 bits positions
The LCD graphic Display expects an Array of Bytes from the XBM format.
XBM is a monochrome bitmap format in which data is stored as a C language data array. Primarily used for the storage of cursor and icon bitmaps for use in the X graphical user interface.
So I added a method to convert my Array of bits into an Array of Bytes.
Many tools including GIMP can save an image as XBM. A nice step-by-step instruction that the API docs show is here.
Code
1 2 3 4 5 6 7 8 9 10 11 12 13 | // - MOSI = 10 // - SCLK = 11 // - CE1 = 7 config = GlcdConfigBuilder //Use ST7920 - 128 x 64 display, SPI 4-wire Hardware .create(Glcd.ST7920.D_128x64, GlcdCommProtocol.SPI_SW_4WIRE_ST7920) //Set to 180 rotation .option(GlcdOption.ROTATION, GlcdRotation.ROTATION_180) .option(GlcdOption.PROVIDER, Provider.SYSTEM) .mapPin(GlcdPin.SPI_MOSI, 19) .mapPin(GlcdPin.SPI_CLOCK, 13) .mapPin(GlcdPin.CS, 26) .build(); |
1 2 3 4 5 6 7 8 |
You can get the full code on my GitHub.
Result
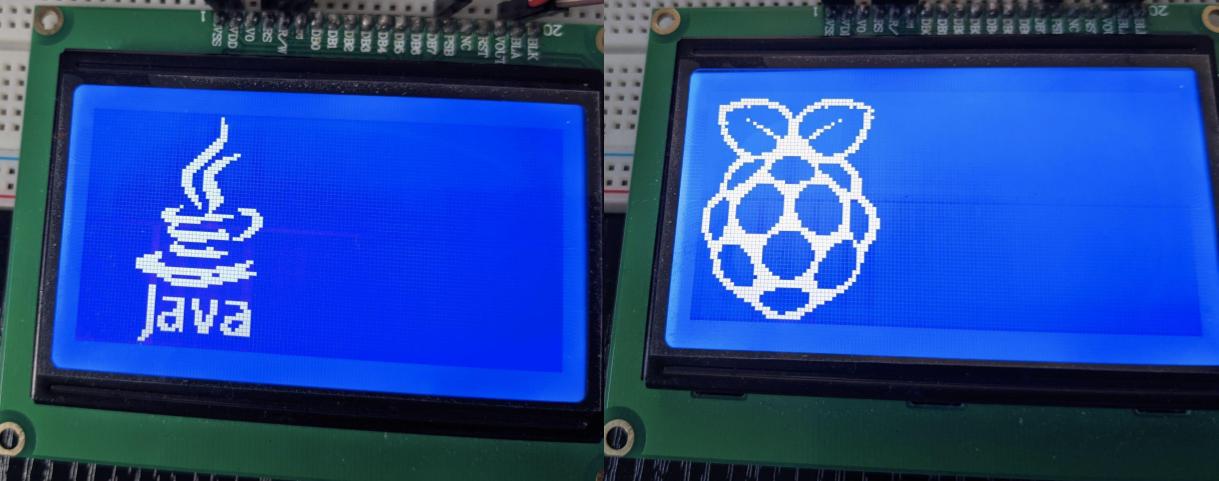
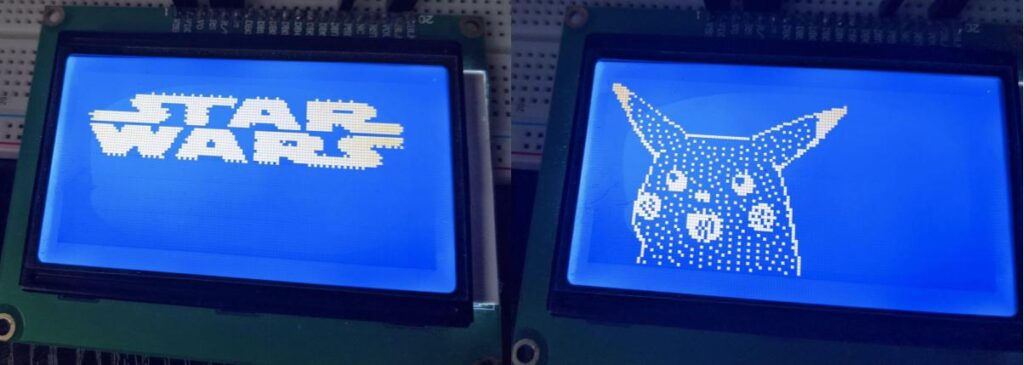
Picture 5: LCD examples
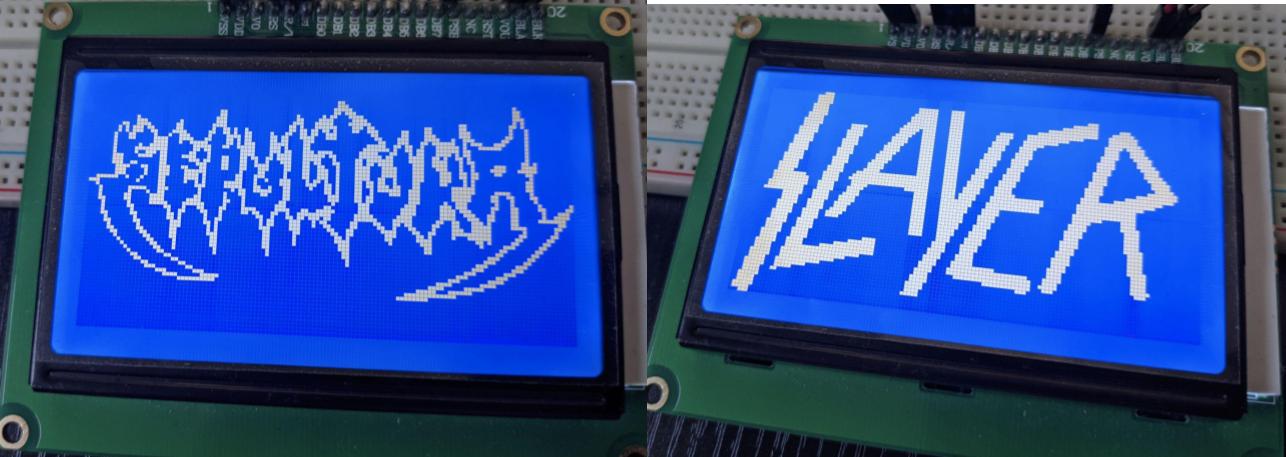
Picture 6: LCD examples
There are some XBM files inside the resources folder and you can follow up on the API example to display these images.
I started to add the logic for a Combobox to show all XMB files inside resources and once selected display that image on the LCD.
The call to action is to go ahead and add this functionality to the application. Just need to add the Combobox and the rule on the java to submit the selected name.
Remember to use the hashtag #JavaOnRaspberryPi on Twitter to show the world Raspberry Pi with Java.
Links
https://en.wikipedia.org/wiki/X_BitMap
https://www.fileformat.info/format/xbm/egff.htm
https://arduino-tutorials.net/tutorial/control-graphic-lcd-display-spi-st7920-128×64-with-arduino
bom dia
fiz exatamente como descreveu no post mais não deu certo, sera que pode me ajudar?
Sim, posso tentar. Qual o erro? oq nao esta funcionado? posta seu codigo no github e manda o link ae! tem que conferir as ligacoes no GPIO tb.