
How’s the lad?
2021/04/18
This post is to show how I created an app demo to control a 4-7 segment display with a Raspberry PI. This is another blog about Java on Raspberry PI.
It’s kind of a continuation from my previous blog 7-segment-display but I pivoted the idea a little bit. I divide the app into front end and back end using React and Quarkus.

Components
- 1x Raspberry Pi
- 1x 4-7segment display
- 4x Resistor 330 ohm
- 12x Jumper wires (generic)
Schematics
I have the “hs420561k-32” model.
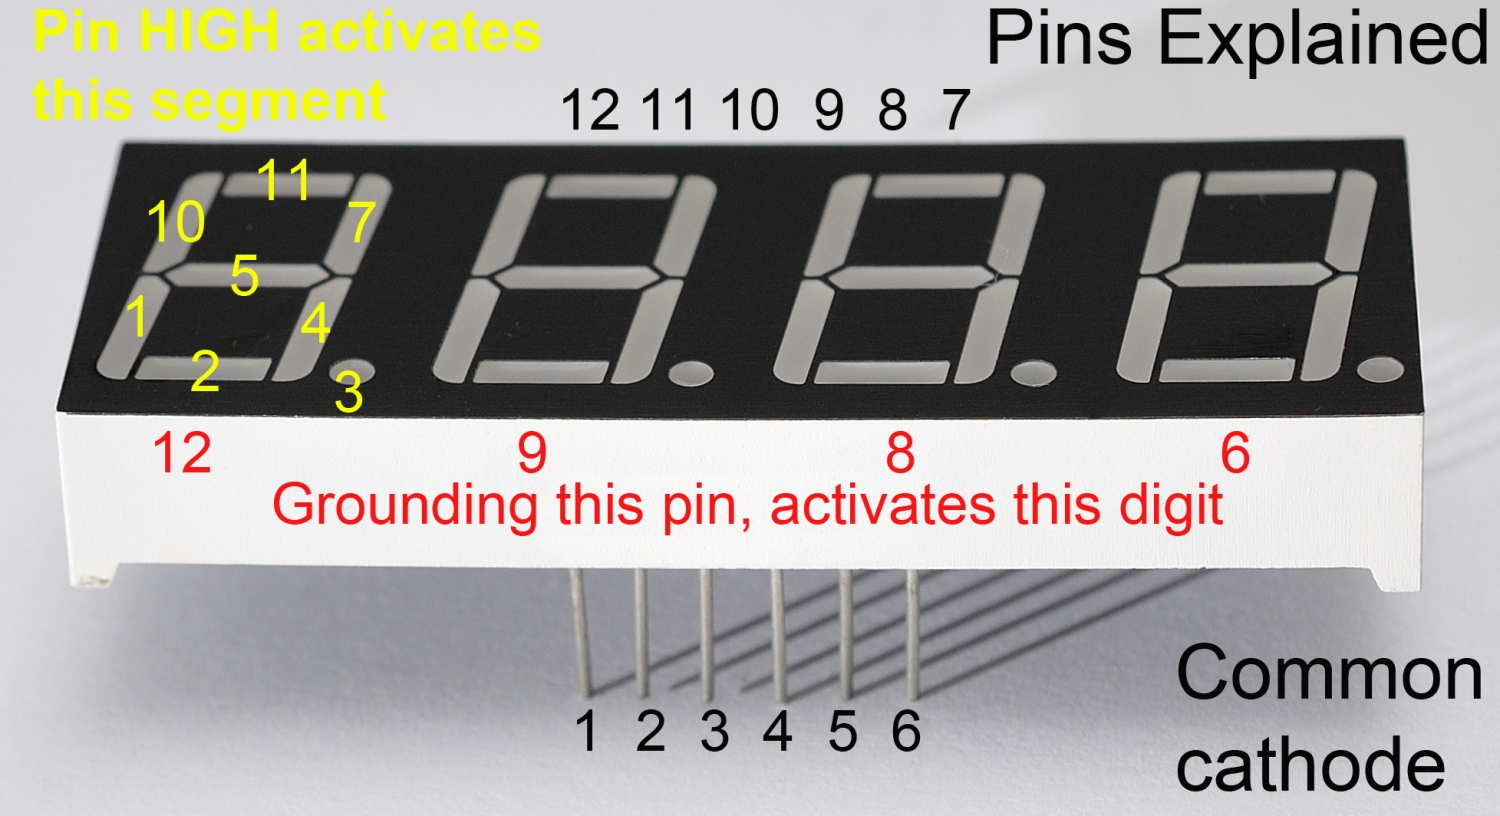
Picture1: component Schematics
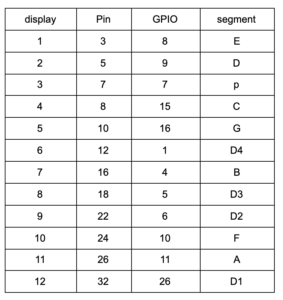
Table1: Pins and GPIOs mapping
Note: Pi4J (by default) uses an abstract pin numbering scheme to help insulate software from hardware changes.Pi4J implements the same pin number scheme as the Wiring Pi
This is the Number for the PI 3 B model.
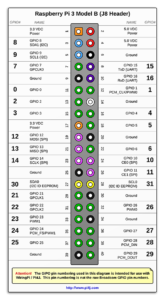
Picture2: PI4J GPIO
Idea
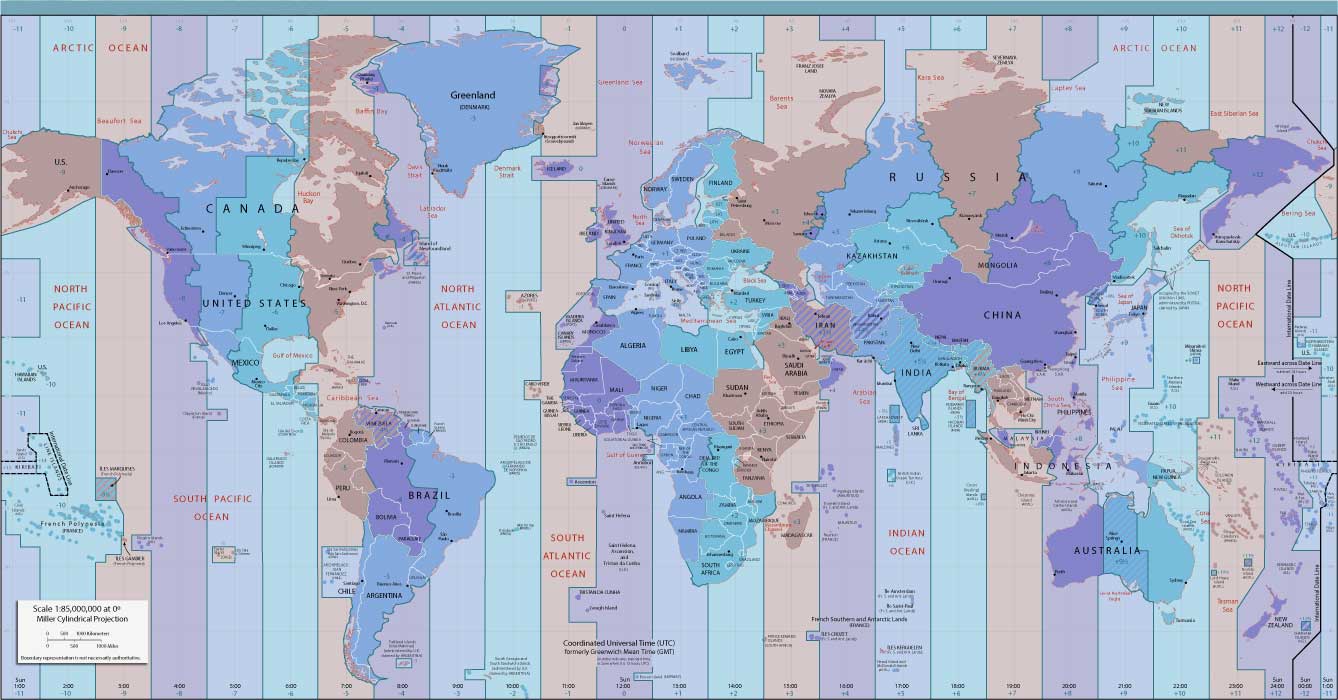
An application that reads available timezones from worldtimeapi.org and displays them in an autocomplete list. When a region is selected it calls the Qurakus REST API passing the current time and Quarkus set the time value on the segment display.

Picture3: End-to-end flow
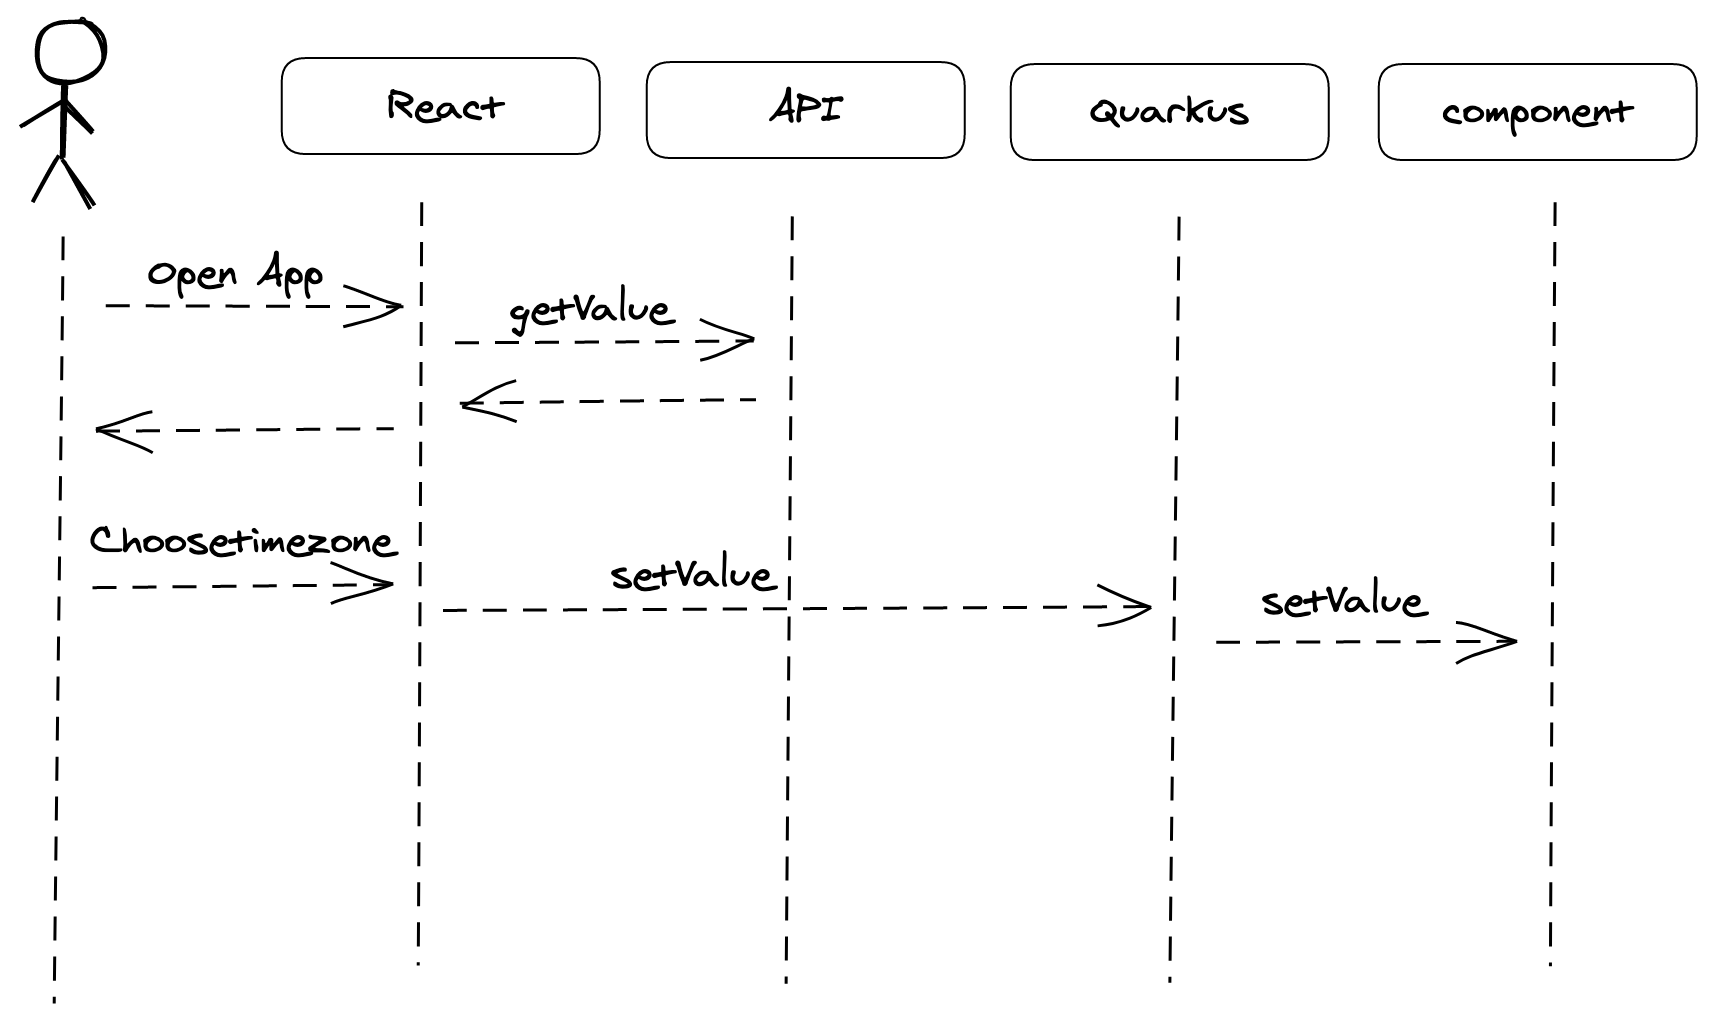
Picture4: Sequence Diagram
The way that you get each digit displaying something different is to switch them on and off again, in turn, faster than the eye can observe. Using the same circuitry to control more than one ‘thing’ is called multiplexing.
Code
1 2 3 4 5 6 7 8 9 10 11 12 13 14 15 16 17 18 19 20 21 22 23 24 25 26 27 | package quarkus47segments.igor; ... @Path("/clock") public class Main { final GpioController gpio = GpioFactory.getInstance(); GpioPinDigitalOutput pin01 = gpio.provisionDigitalOutputPin(RaspiPin.GPIO_08, "1", PinState.LOW); ... @GET @Path("/{name}") public String greeting(@PathParam("name") String name) throws InterruptedException { System.out.println("Time " + name); setClockValue(name); return "hello " + name; } public void setClockValue(String value) throws InterruptedException { ... } public void display(int number) { ... } } |
The code itself is pretty ugly. I could make it into a library so that everything looks nice and clean. But bla bla bla …
Picture5: meme
Kudos to Elaine Akemi that created the React app for me. You can get the React code here.
You can get the Quarkus code on my GitHub.
Result
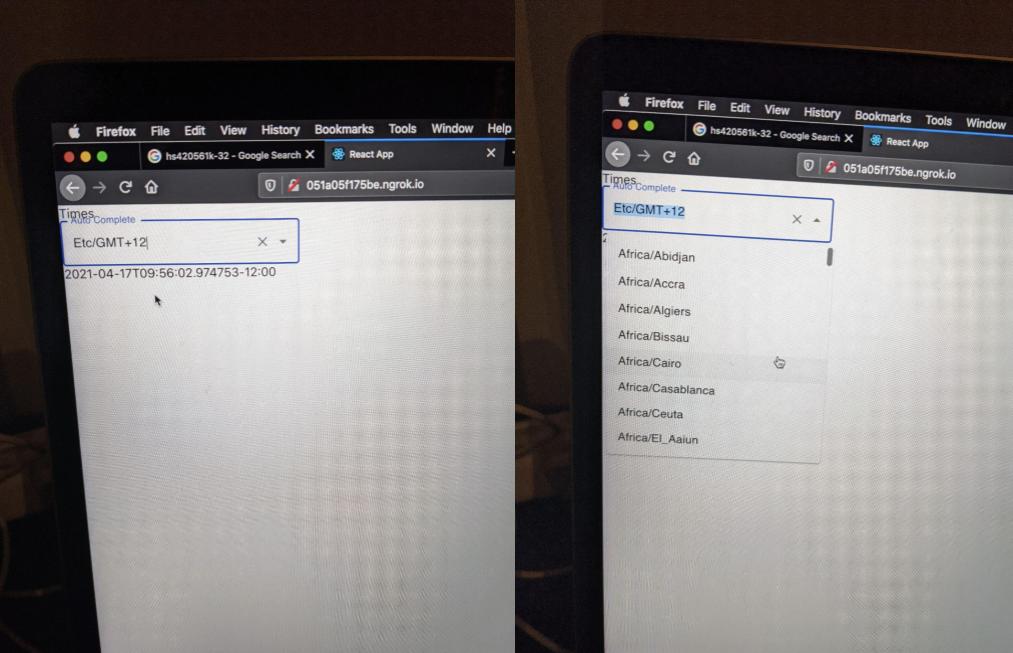
Picture6: React app with an auto-complete Combobox
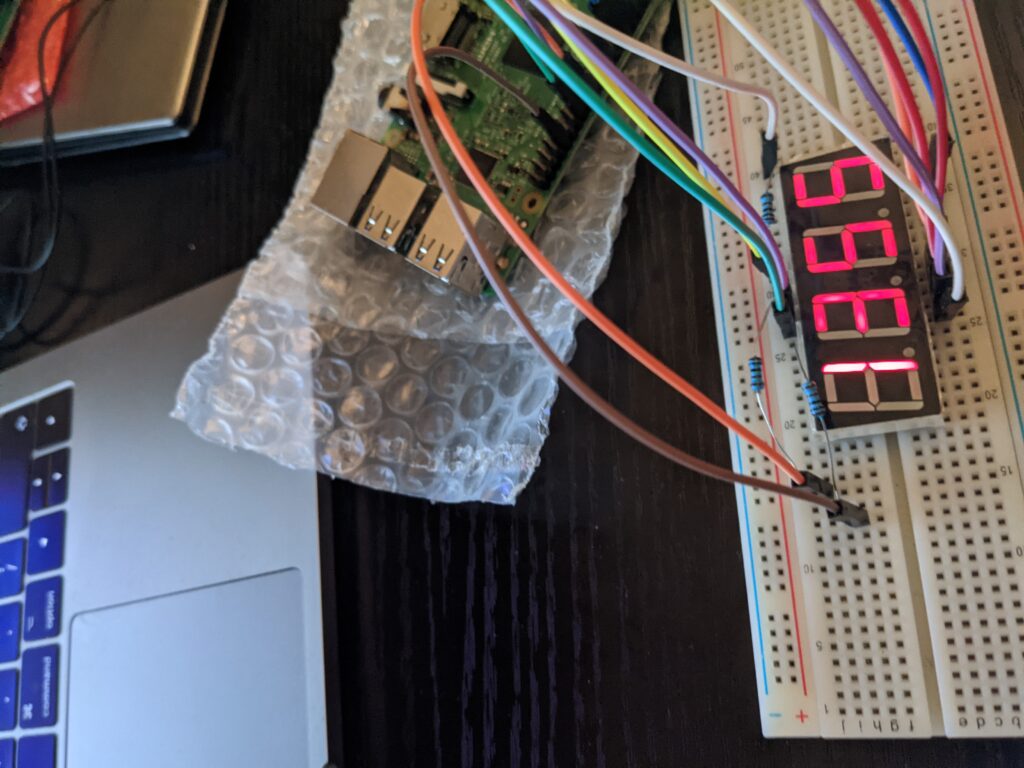
Picture7: example